Adding a New Network to MetaMask - Blast Public API
A step-by-step tutorial on how to add a network to MetaMask using a public RPC endpoint and the Blast platform.
In this guide, you will be shown how to change the RPC endpoint in MetaMask's network configuration to a custom, public endpoint.
Prerequisites
- MetaMask browser extension installed
If you don't have the MetaMask extension already installed on your browser, you can easily get it from one of the following links depending on your browser of choice:
Otherwise, you can find it relatively easily by a simple Google search.
Once you have MetaMask installed you just need to follow the steps described below to get access to a dedicated blockchain endpoint.
Adding your custom Public RPC endpoint to MetaMask:
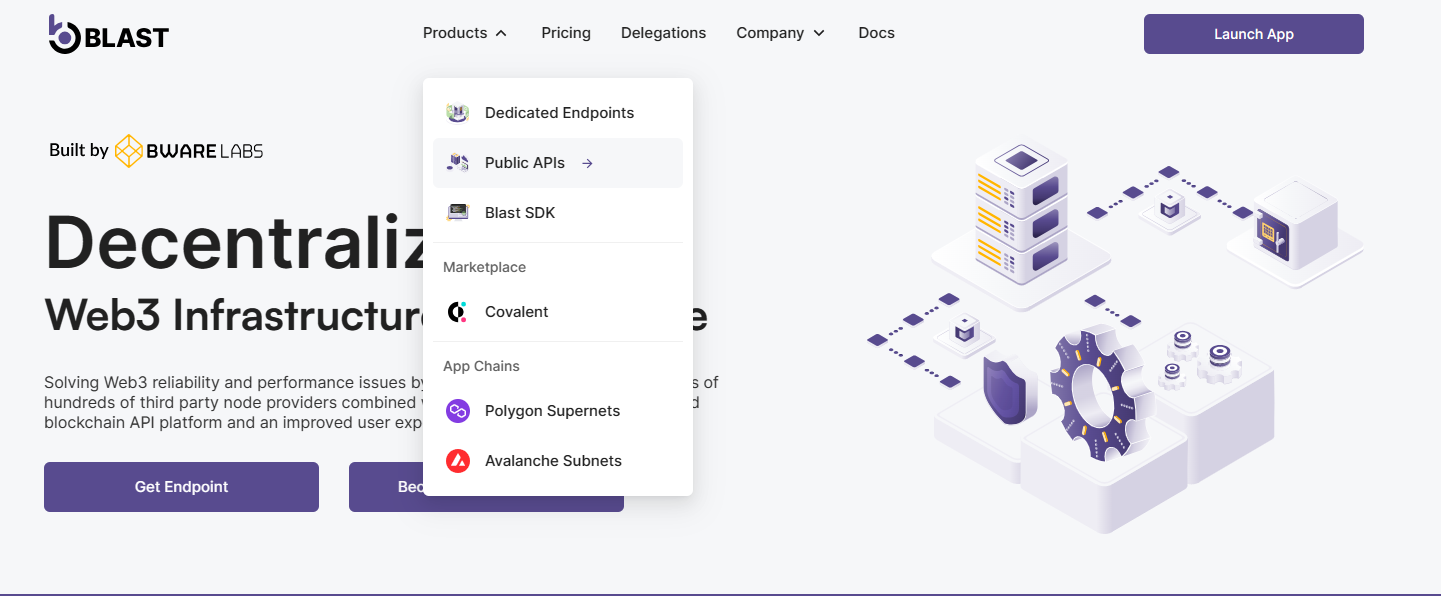
- Head over to https://blastapi.io and click Products->Public API
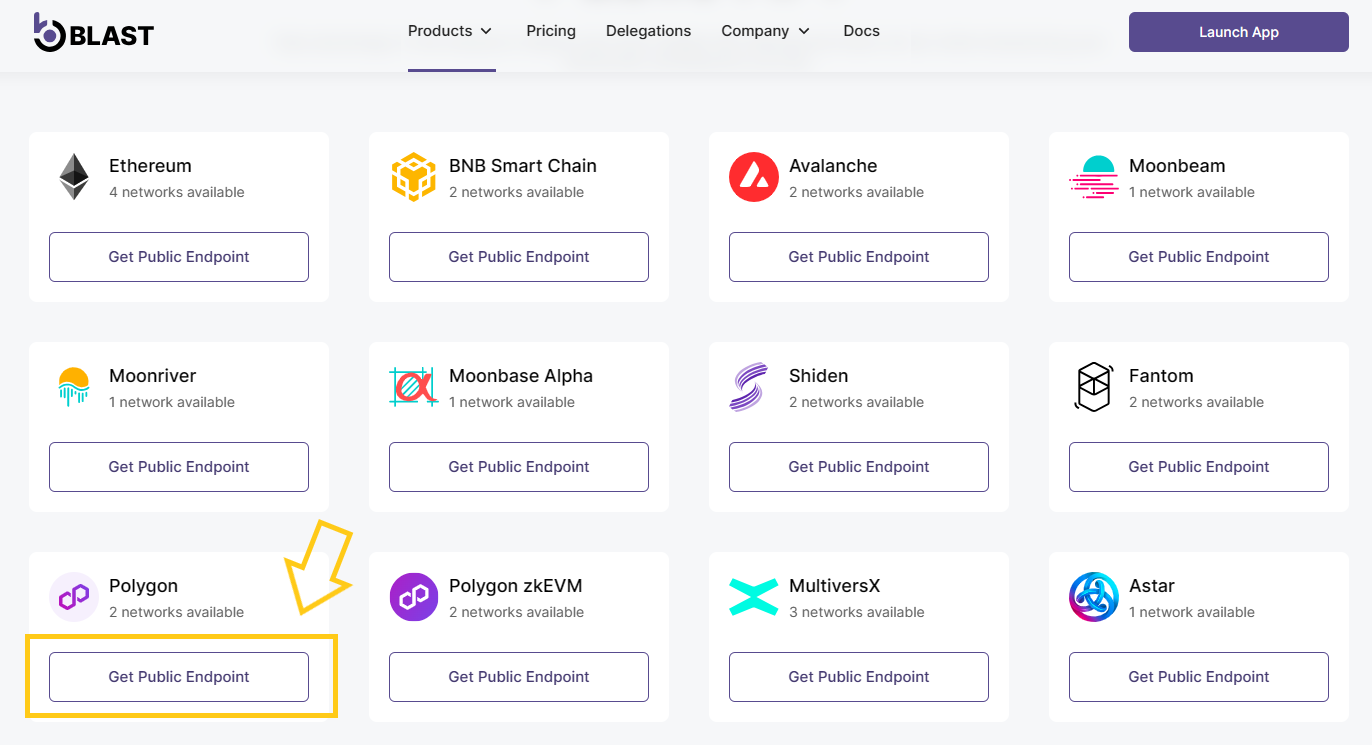
2. Choose your desired network, and click Get Public Endpoint. For this tutorial, we have chosen to use the Polygon Mainnet endpoint.
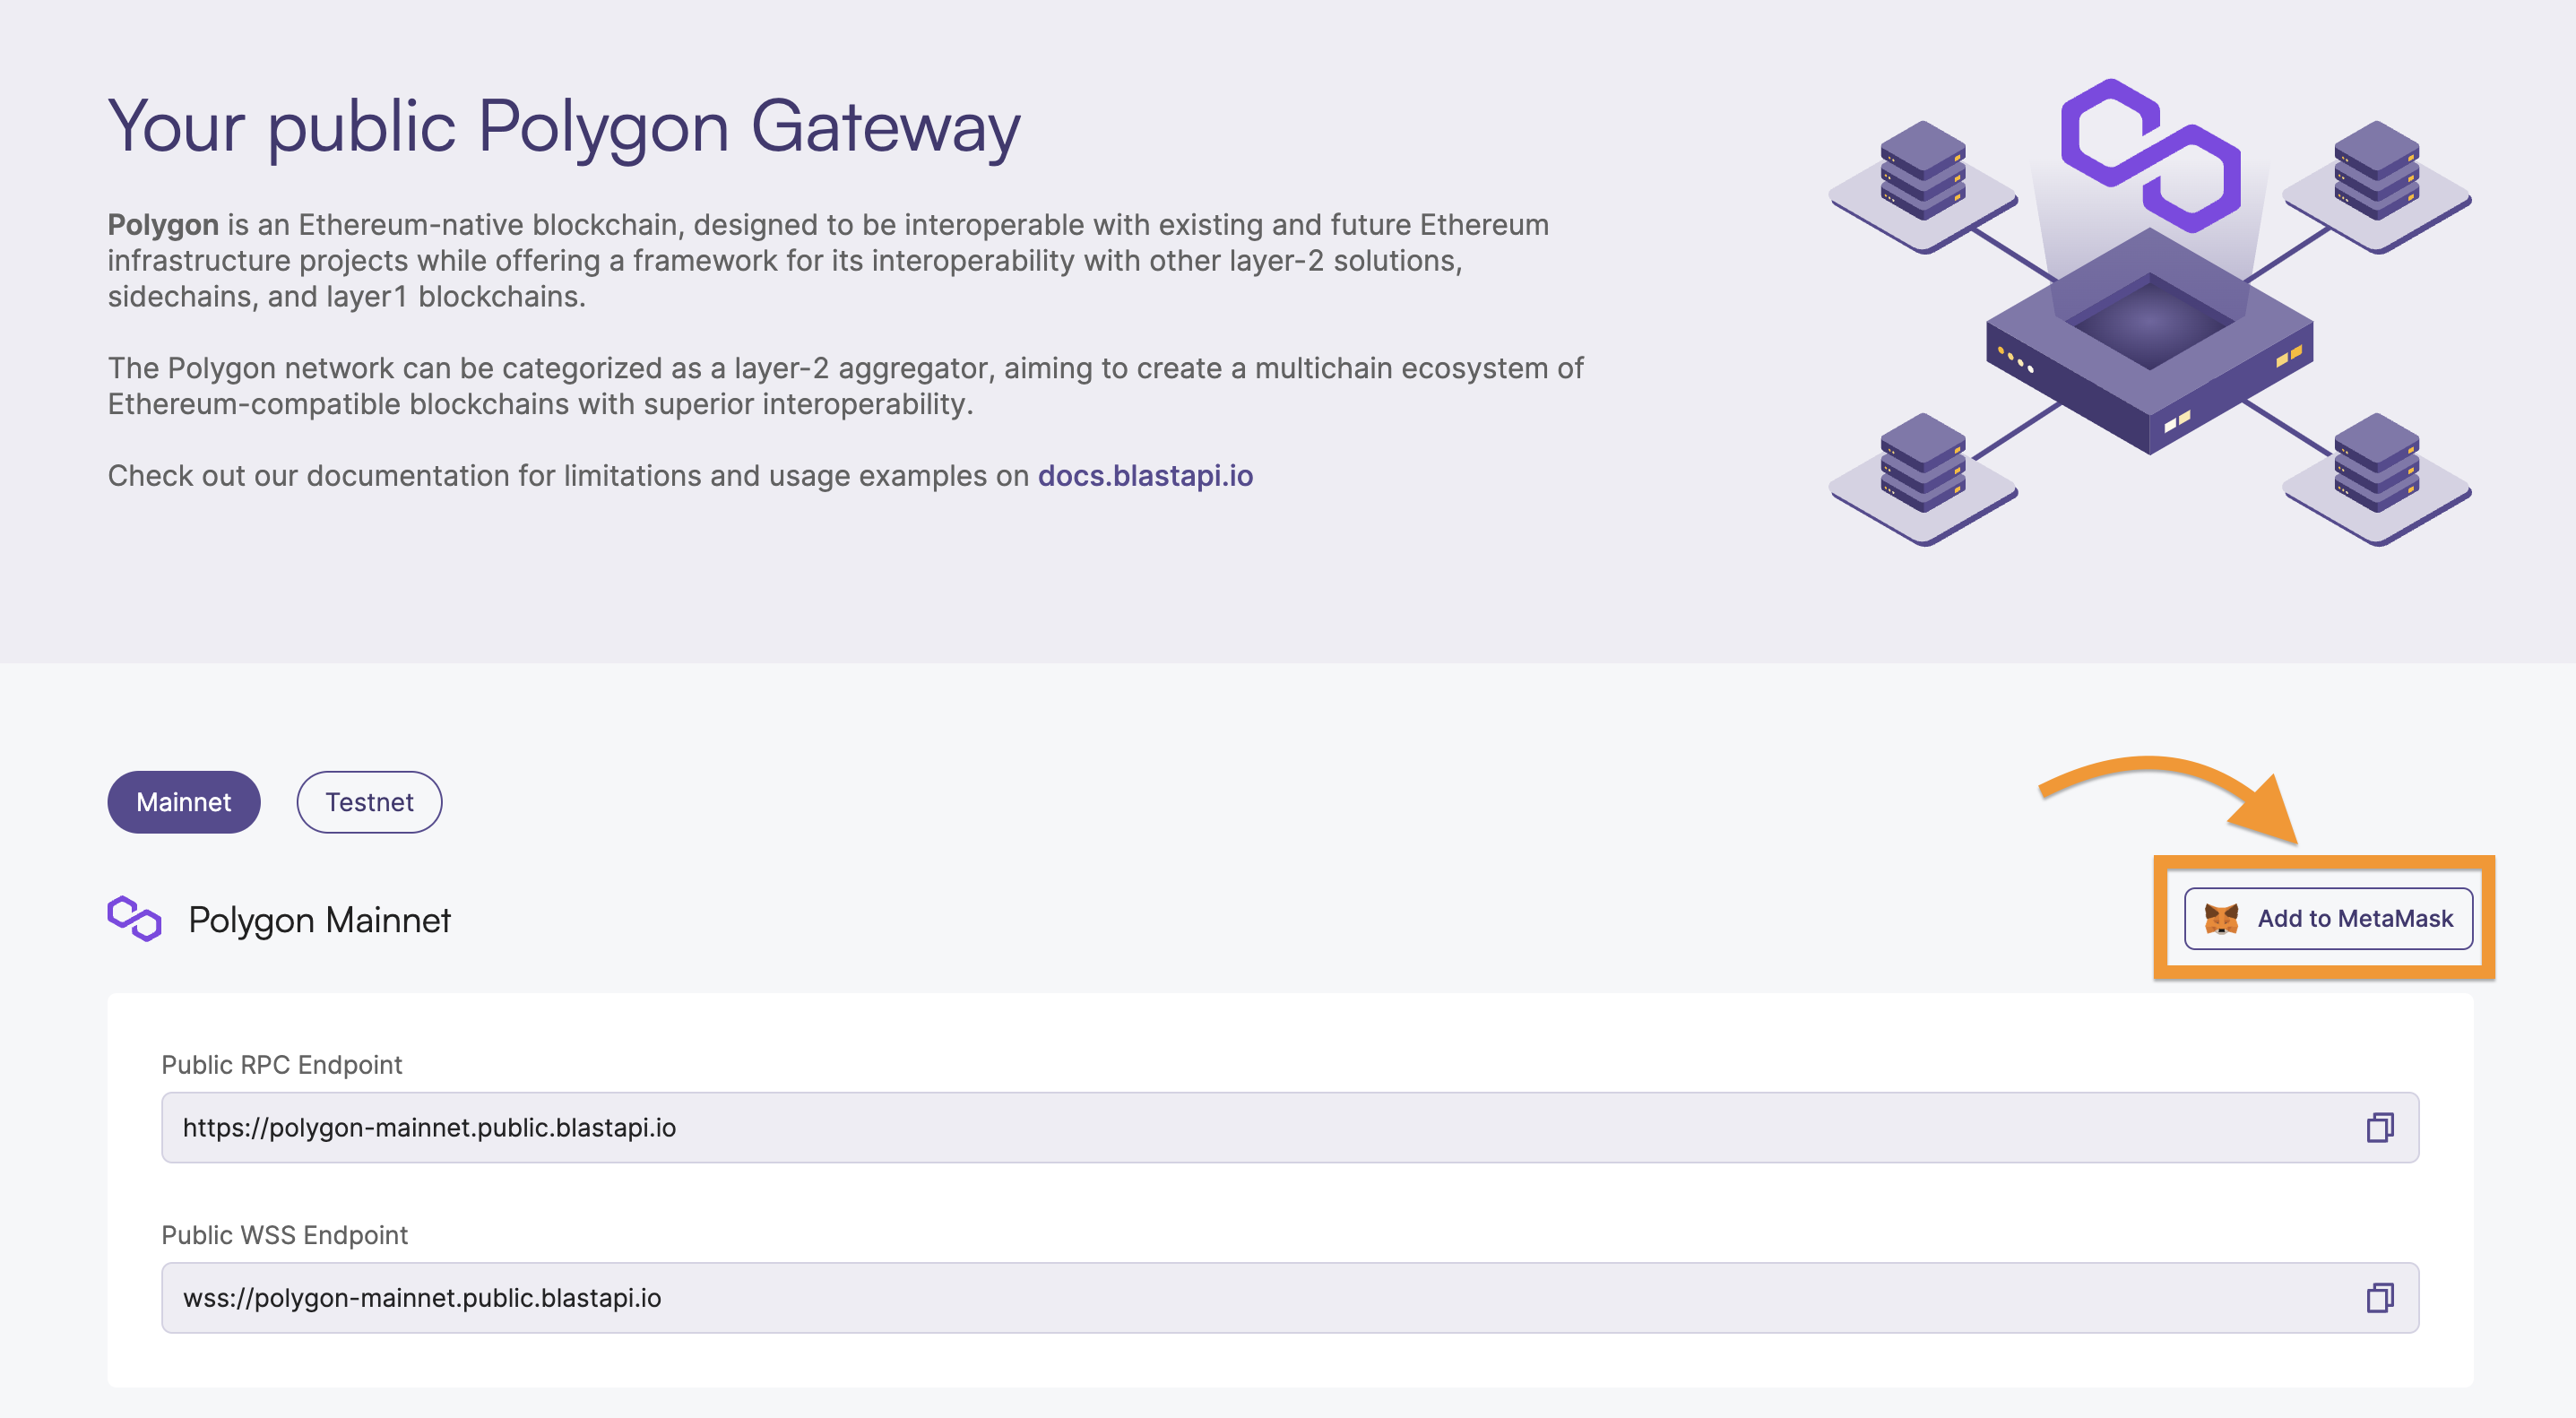
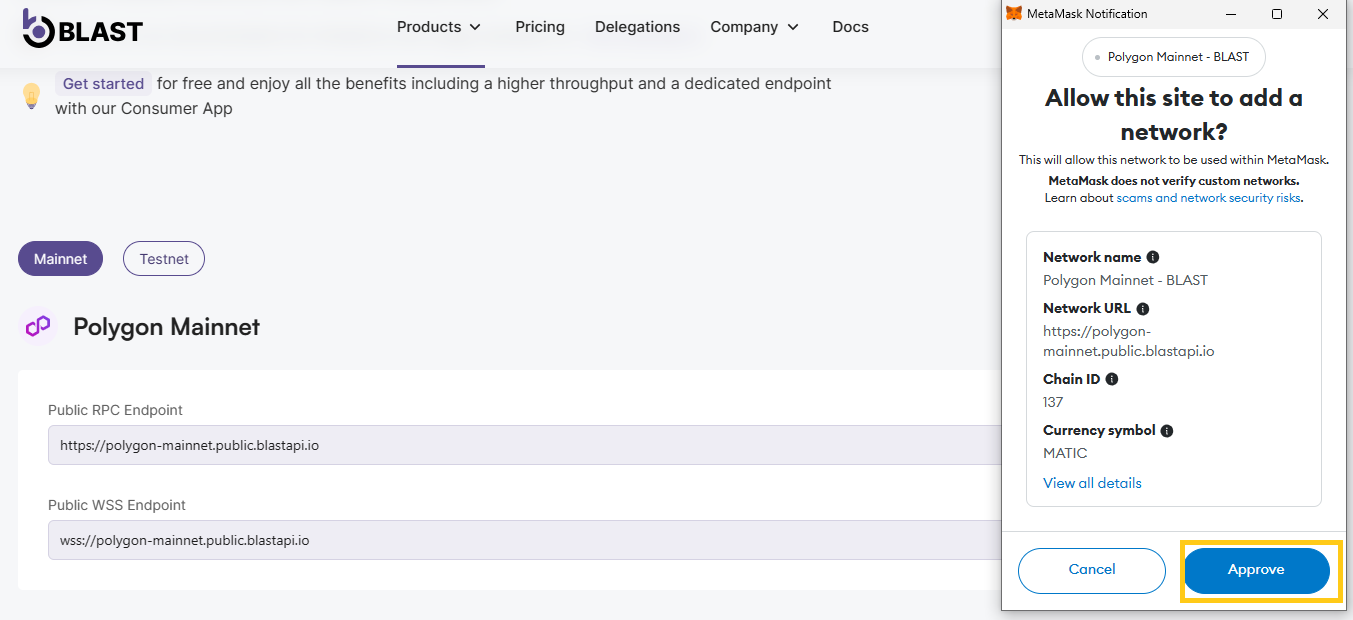
3. There are two ways of adding your desired RPC endpoint to MetaMask. You can grab the URL and manually configure the required parameters, or you can click on the Add to MetaMask button. We will use the second option for this tutorial.
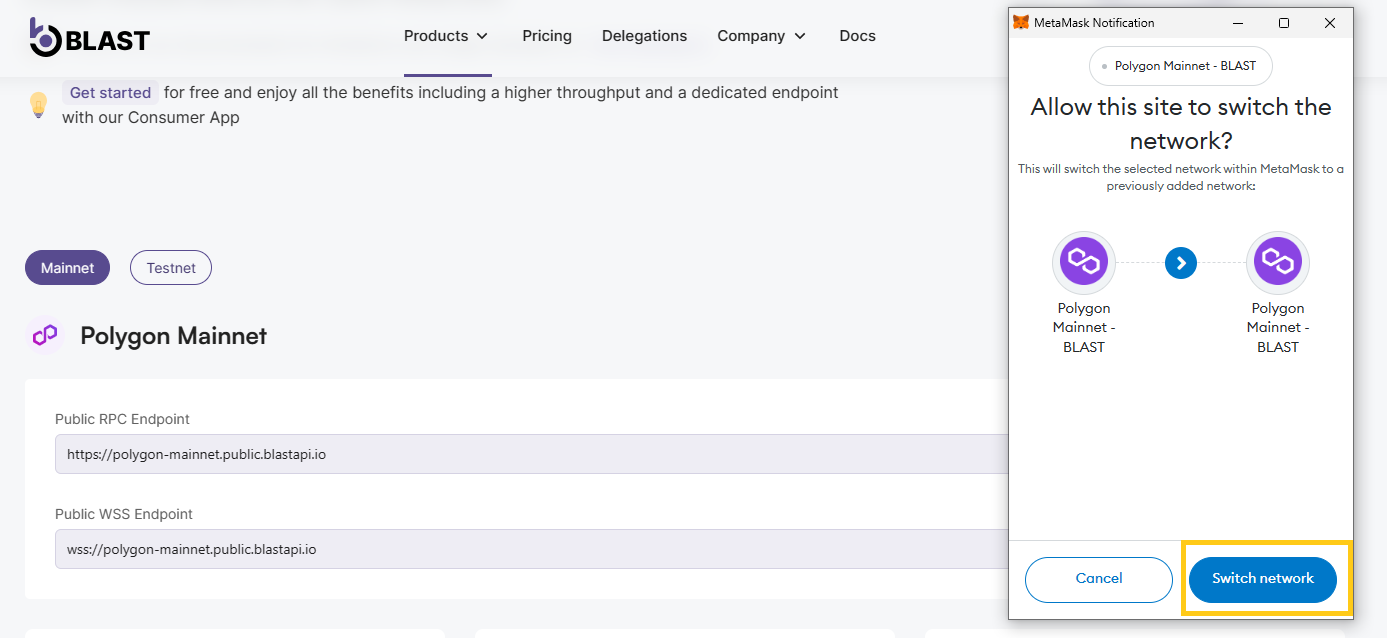
4. Once clicking the button, it will pre-fill all your needed information and create a confirmation window asking you to add the specific endpoint to MetaMask. Go through the overlay window - Allow this site to switch the network? and check all the details.
5. Next, you will be asked to choose to switch to the chain by clicking on Switch network. Approve the switching and check your new configuration.
