Configure Allowlist
This tutorial will guide you through the process of managing your allowlists.
Introduction
The Allowlist feature provides a simple and effective solution to manage access to your endpoints and limit API traffic based on IP and domain, preventing unauthorized access and enhancing the security of your projects.
For instance, you can allow access to the project exclusively from the IP address of your office network. Any other request from a different IP will be Unauthorized.
Prerequisites
- A compatible wallet for the blockchain network installed on your device, such as MetaMask browser extension or any wallet supporting the Wallet Connect protocol on your phone or laptop.
- Login already performed on Consumer APP
- Project already created as mentioned in this section
How to use Allowlist feature:
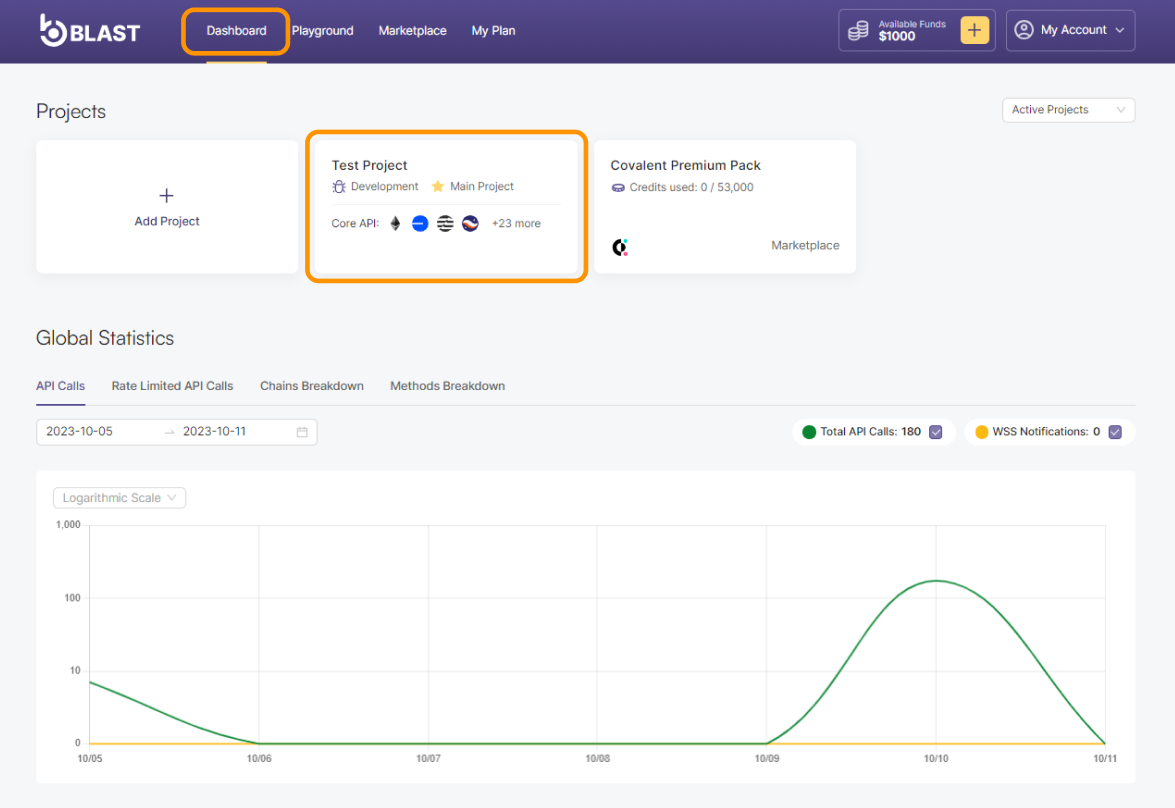
- Navigate to the Dashboard page and select your project.
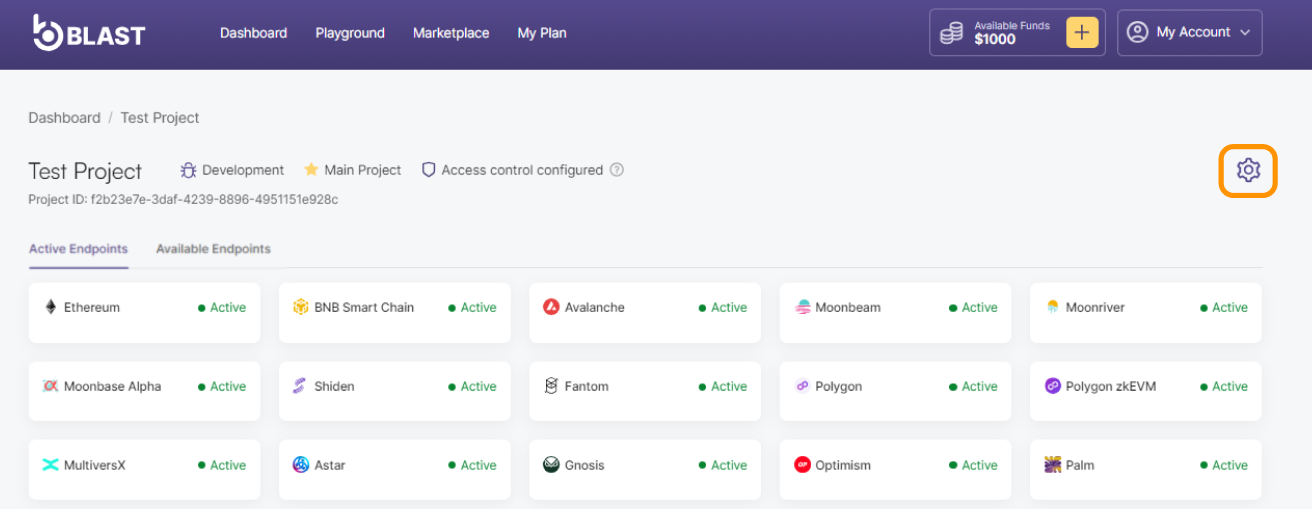
- Click on the gear icon on the top right corner to expand Project Settings.
- Provide the domain or IP address you wish to include in the allowlist, and then click the "Add" button to proceed
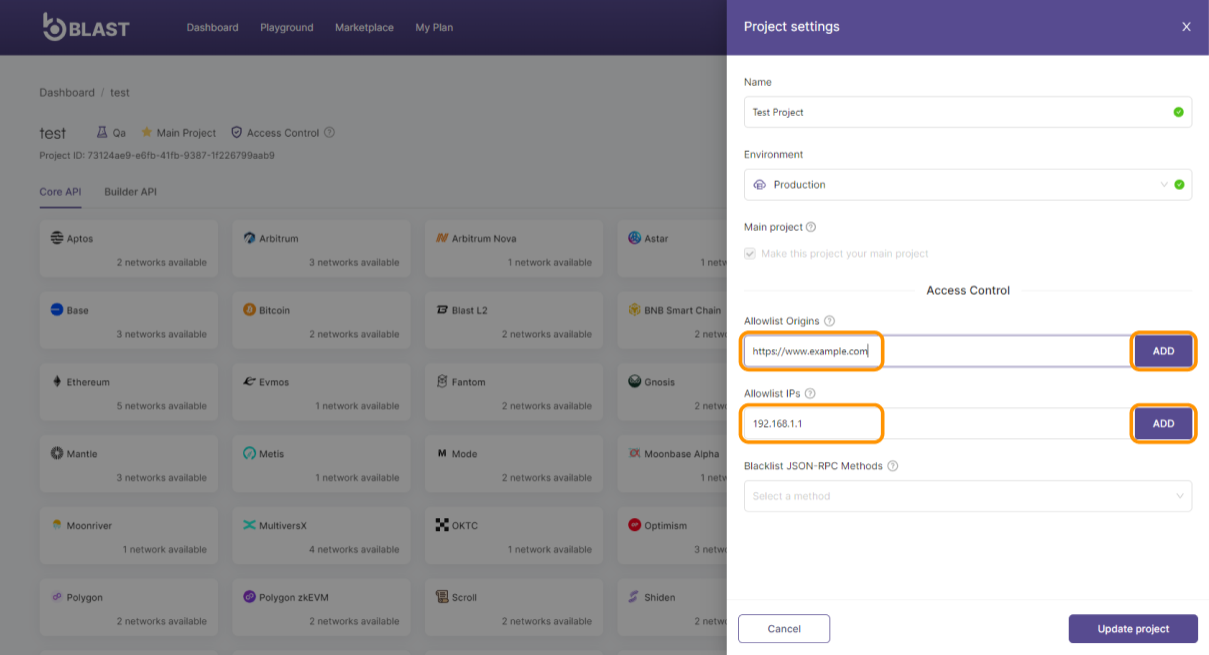
Please make sure that the IP address you enter matches to either the IPv4 or IPv6 format, depending on your configuration.
Once you have successfully added a domain to the allowlist, it is essential to incorporate the Access-Control-Allow-Origin header into your requests. Set the value of this header to your allowlisted domain, specifying that the resource can only be accessed from that particular origin. For instance:
curl -X POST https://eth-mainnet.blastapi.io/<PROJECT_ID> \
-H 'Content-Type: application/json' \
-H 'Origin: https://www.allowlisted-domain.com' \
-d '{"jsonrpc":"2.0","id":0,"method":"eth_blockNumber"}'
Note: You can add up to 20 domains and 20 valid IP addresses.
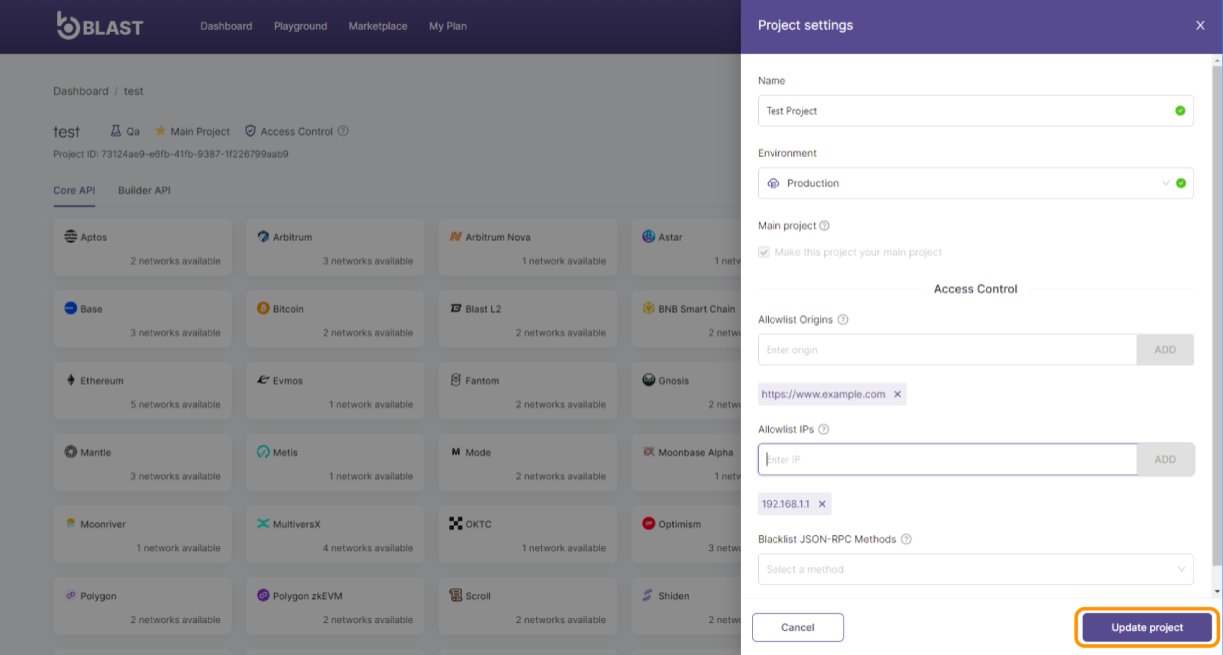
- Click Update project button to save your changes.
Examples:
To ensure a clear understanding of how you should enter IP addresses and domains to the allowlist, here are some concrete examples:
- IP Address: If you wish to add an IP address, make sure it is in the correct format (IPv4 or IPv6). For instance:
- For IPv4:
192.168.1.1 - For IPv6:
2001:0db8:85a3:0000:0000:8a2e:0370:7334
- For IPv4:
- Domain: When adding a domain, you may include or omit the HTTP/HTTPS protocol, depending on your project's specifications. However, specifying the protocol is recommended to avoid confusion. Examples:
- With protocol:
https://www.example.com - Without protocol:
www.example.com
- With protocol:
Please note that in some cases, specifying the protocol may be necessary to ensure compatibility with your project's security configuration.
If your IP address or domain changes frequently (dynamic IP), consider using a DNS service to maintain a consistent domain name that updates to point to your current IP address. This approach can help manage allowlist entries more effectively.
Troubleshooting Allowlist errors:
If you encounter authorization issues after adding IP addresses or domains to your allowlist please follow these troubleshooting steps first:
- Ensure that the IP address you're entering is in either IPv4 or IPv6 format, based on your configuration.
- Ensure that you include the allowlisted domain as the value of the Access-Control-Allow-Origin header. This header allows requests from the specified domain to access the resource.
- When encountering allowlist-related errors, check if the IP address or domain added follows the correct format example provided above, including or excluding the HTTP/HTTPS protocol as applicable.