Bridging $INFRA tokens to Avalanche
A guide on how to bridge $INFRA tokens from Ethereum to Avalanche chain.
Prerequisites
Please remember that in order to reduce each delegator’s transaction fees and make delegations more appealing to everyone, The Blast Staking protocol is deployed on Avalanche.
So in order to delegate (stake), you first need to make sure that your $INFRA tokens are bridged on the Avalanche chain.
\
Note: If you hold your tokens on a centralized exchange, you can only withdraw them on the Ethereum chain. Alternatively, you may hold your tokens in a self-custodial wallet such as Metamask, Coinbase Wallet, WalletConnect, or Core Wallet on the Ethereum chain. In both scenarios, you will need to bridge your tokens to the Avalanche chain in order to stake or delegate them. \
How to Bridge?
There are a few simple steps that you need to follow, which should take about 2 minutes to bridge $INFRA from Ethereum to Avalanche.
Firstly, make sure you have already installed a self-custodial wallet (We will use Metamask as an example). Additionally, you should own $INFRA tokens on the Ethereum chain and have some ETH available to cover the gas costs.
The same process is available to bridge tokens from Avalanche C-chain to Ethereum. Please keep in mind that if you have a token airdrop on Avalanche you should first bridge your tokens on Ethereum before sending them to your preferred centralized exchange. Sending tokens on centralized exchanges on the Avalanche C-chain directly might result in a permanent loss of funds!
Add Avalanche network to your wallet
For adding the Avalanche network to your wallet, you can use a public endpoint from Blast. Navigate to https://blastapi.io/public-api/avalanche and press the “Add to Metamask” button. Then press the the “approve” button on your Metamask popup.
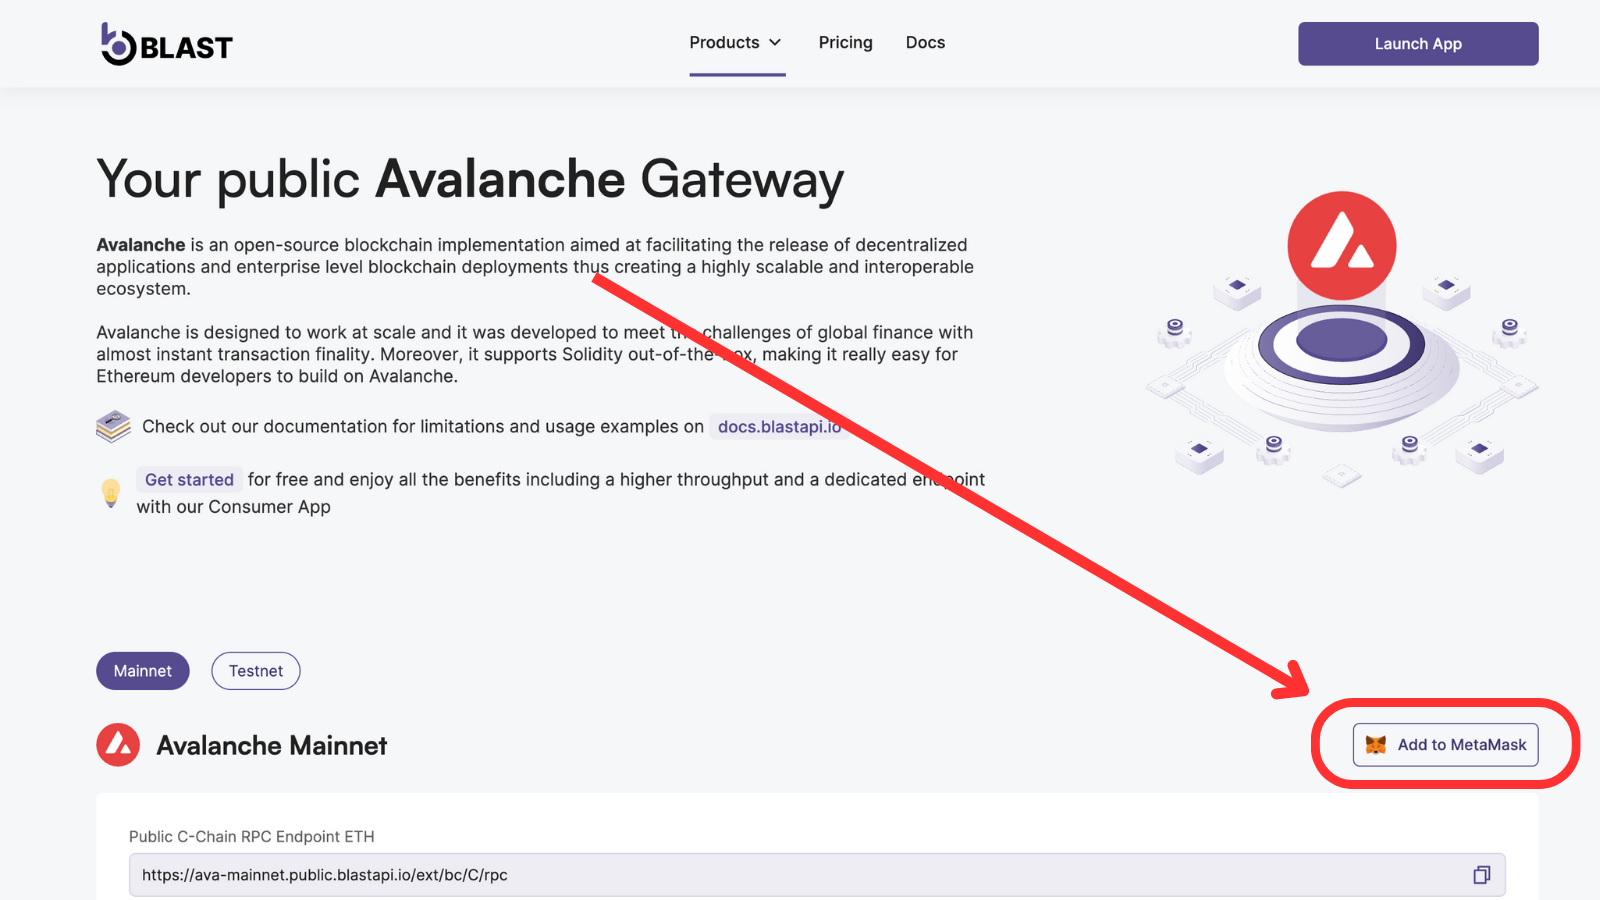

You can also add it manually using this guide.
Bridging to Avalanche
Now that you have added the Avalanche network to your wallet, assuming you have $INFRA tokens on the Ethereum chain, you are ready to bridge them to the Avalanche chain.
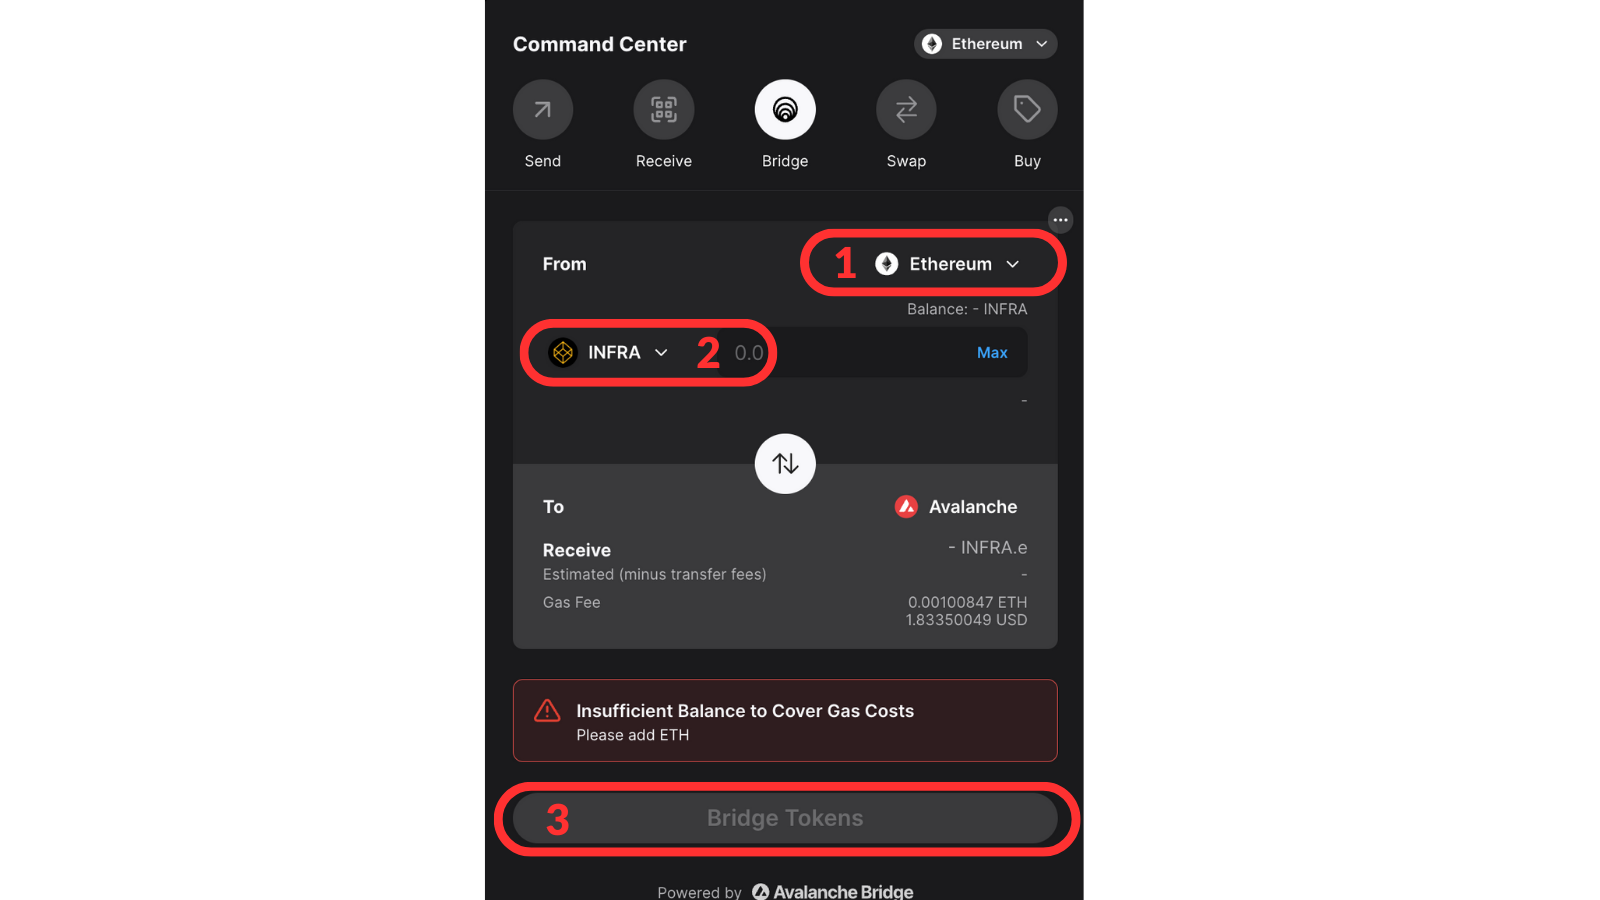
Enter the Bridge App here: https://core.app/bridge/, connect your wallet to your bridge app and follow the steps below:
\
Step 1. Connect your wallet to the bridge app and choose the Ethereum network you want to bridge from (Step 1).
Step 2. Next, select the $INFRA token.
Step 3. Click on the "Bridge Tokens" button.
Approve the transaction, and your chosen amount of tokens is now available on the Avalanche chain.
Viewing $INFRA tokens in your Metamask
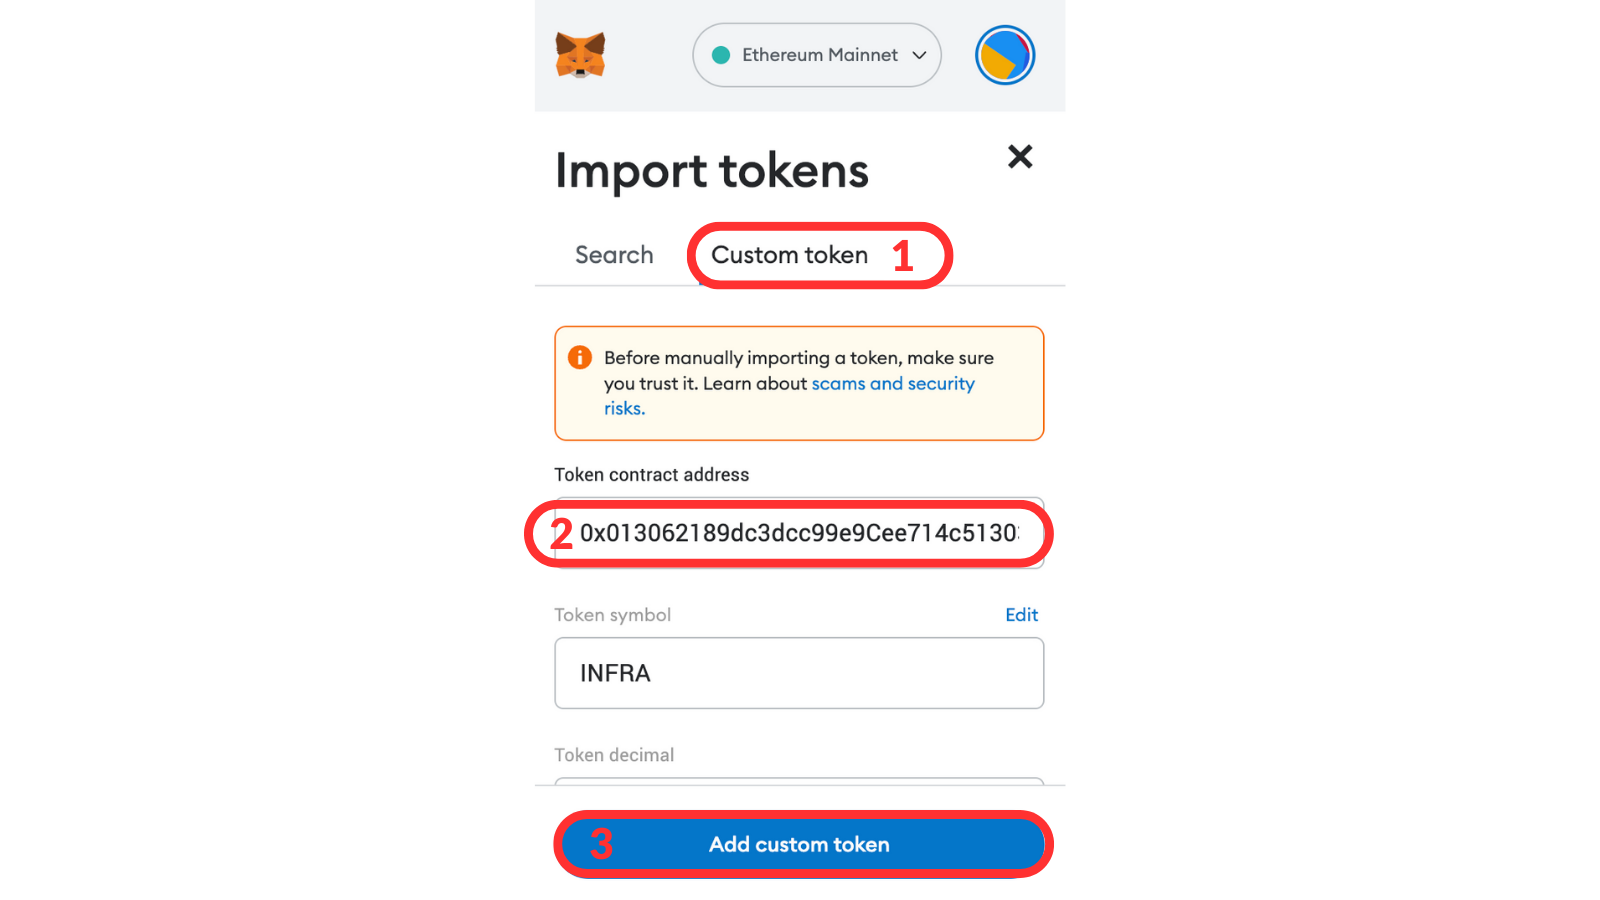
To view the $INFRA tokens on your Metamask wallet click on the "Import Tokens" option in the assets field and follow these steps:
\
Step 1. Select "Custom Token."
Step 2. Add the $INFRA contract address: 0x013062189dc3dcc99e9Cee714c513033b8d99e3c.
Step 3. Click on the "Add Custom Token" button.
You are now able to see and manage your $INFRA tokens within your Metamask wallet on the Avalanche Chain. To delegate/stake your tokens in Blast, follow this guide.
\
\